
AV3412
South Beach
Render of South Tower
Introduction
For AV3412, I set about producing a 3D recreation of South Beach, a multiuse urban development in Singapore.
My honours project would therefore consist of a 3D architecture and urban environmental design concept. This fit well into my existing interests in 3D modelling and architecture.
Render of South Beach Avenue

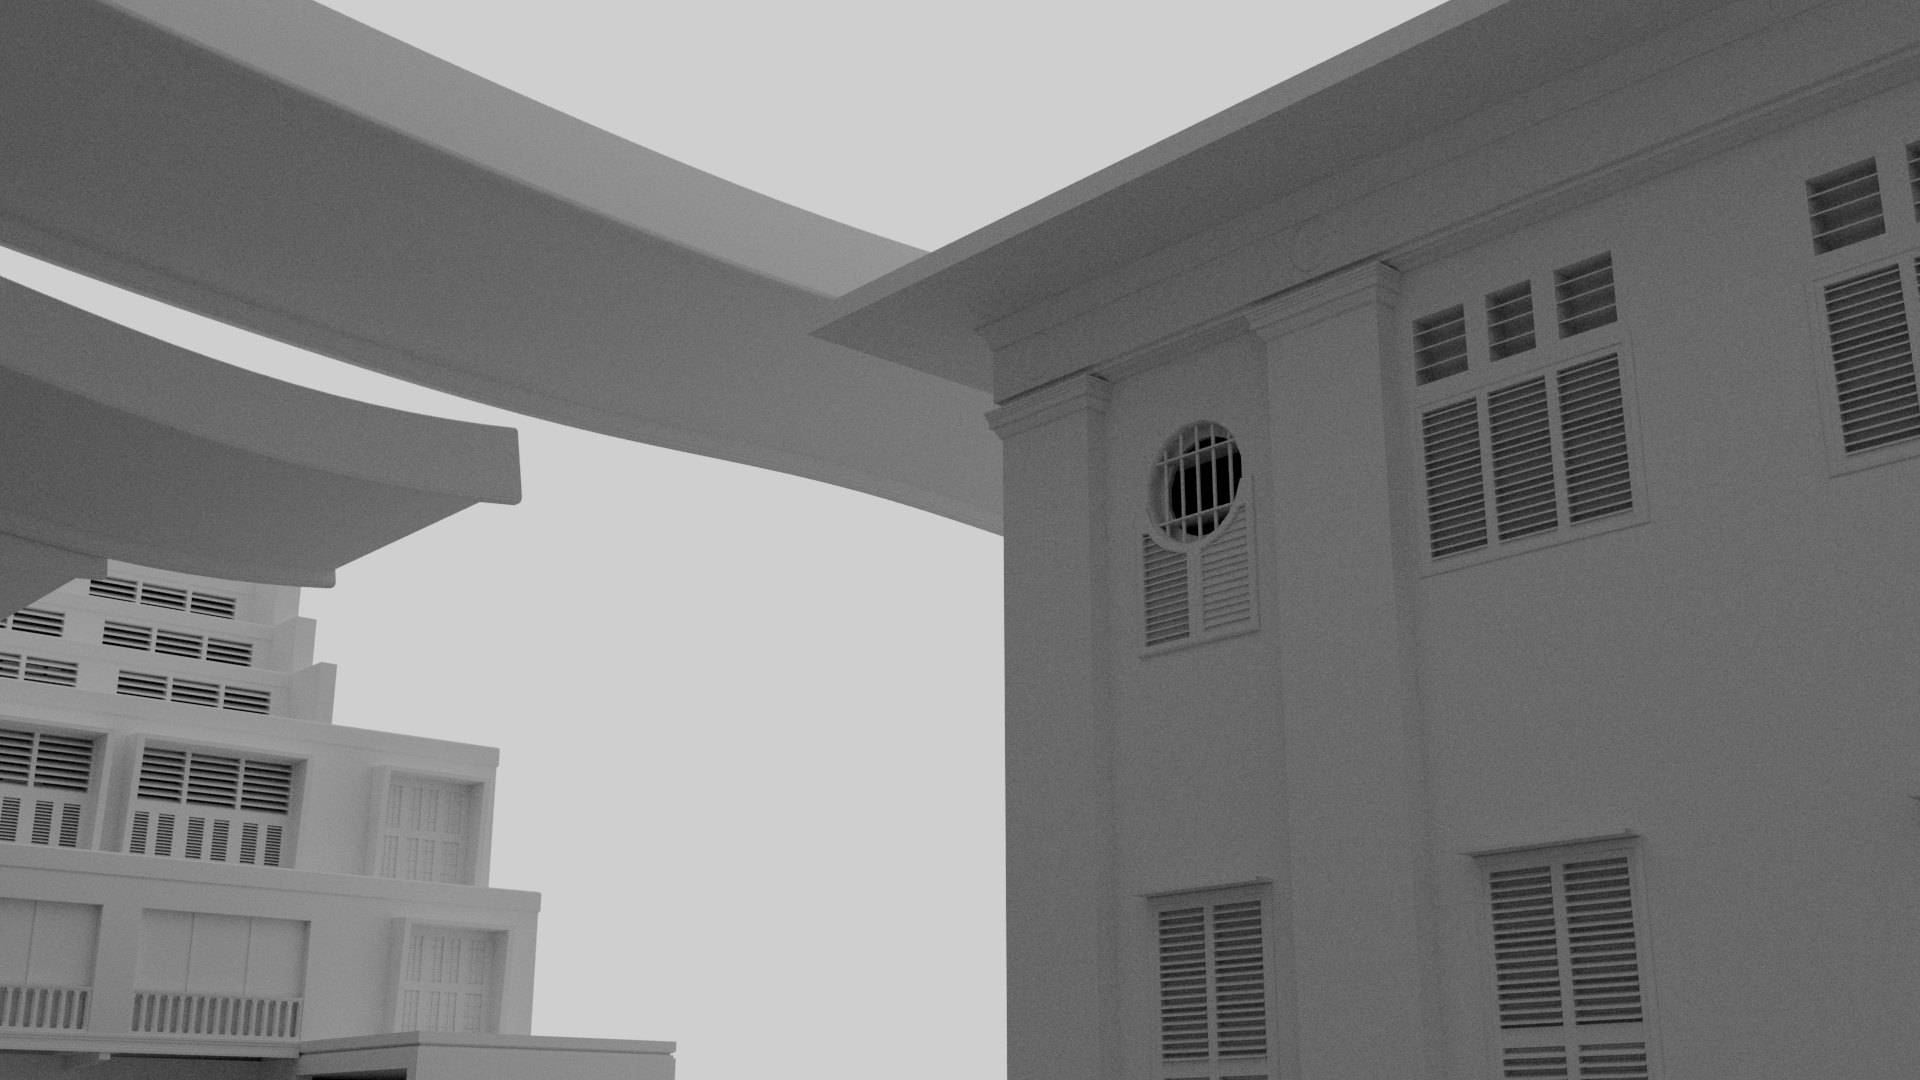
Render of the Canopy
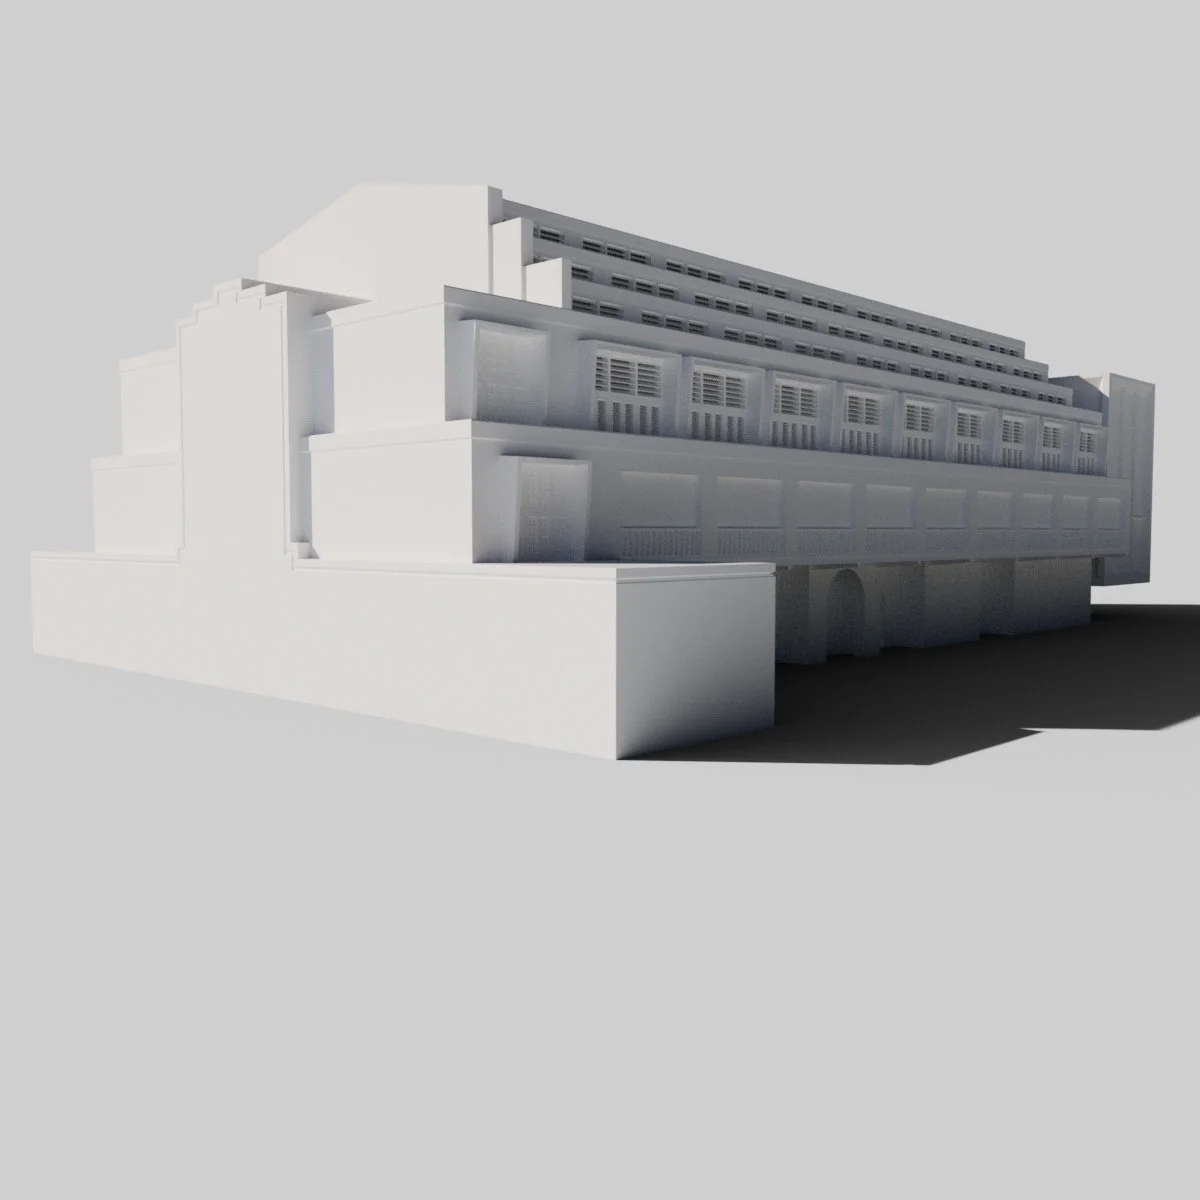
Render of the Grand Ballroom
Reference and Research
This project would involve creating not just 10 buildings, but also the environment and the surrounding details.
To get started, I looked at the Foster + Partners website. Foster + Partners are the architectural company behind designing South Beach, and they had a plethora of available blueprints and construction resources, but not quite as many as I would need.
To find all the resources I would need for this project, I searched around and found two papers, which greatly assisted by ability to pull off the two skyscrapers which dominate the skyline of the site. These papers can be found at ResearchGate, and the Council on Tall Buildings and Urban Habitat. Both papers brought something essential to the fore, and the project would not have been possible without them.
Whilst all of these images were incredibly helpful in the initial layout of the scene, and in deciding how wide and long each of the buildings needed to be, they did not offer nay real detail assistance. For this, I turned to Google Street View.
Google Street View has the majority of South Beach mapped out, allowing me to largely use it as a constant reference. Whilst I was modelling the buildings, I kept Street View open on another monitor, referring to it constantly to ensure I was keeping accurate and maintaining size, scale and positioning,
It would not be possible for me to maintain 100% accuracy in this project, but I strove for it whenever I could. Part of the reason for this was that everything I produced acted as a sort of barometer for the next model I produced, so if I took a considerable number of leniences with one model, the next model would potentially suffer, and a mass of inaccuracies could hurt the final product.
Modelling and Changing Plans
The initial idea behind this project was to create a fully modelled, textured, and lit recreation of South Beach.
Following the gathering of reference imagery, I began to produce the first of ten buildings. Block One is one of the conservation buildings on the site - one of four, and as such, it had a different architectural style to it which differentiated it from the styles seen in the more modern buildings which dominate the site.
The first part of the process was identifying the primitive objects - cubes, spheres, cylinders etc - which I could use to simplify the overall building. Some more custom parts were needed, especially for pillar bases and for the architrave.
Lower Archway Isolated
Upper Archway Isolated
Lower Short Wall Isolated
Object ID Pass of Block One
Upper Short Wall Isolated
Modularity
Only once I had begun to produce Block One and saw the immense number of objects I would need to texture, did I realise that having a fully textured version of the final product would not be possible. There was simply too much I would need to texture, and Block One was far from the most complicated model I would have to produce.
This was also when I realised that this project was going to overwhelmingly rely on my ability to intelligently reuse and repurpose various assets for the different buildings and the environment. In essence, everything was going to have to be modular, putting more emphasis on copies of the same object being arranged accurately along the blueprint than bespoke models for every single building. This would also help to reduce the file size. Whilst Block One was not too complicated, all the different parts were separate models, including the slats in the doors. Whilst these models were simple, only skewed cubes, the number of them promised to cause issues when the file was being read, both as an isolated scene file and when it was imported or referenced into a collective file.
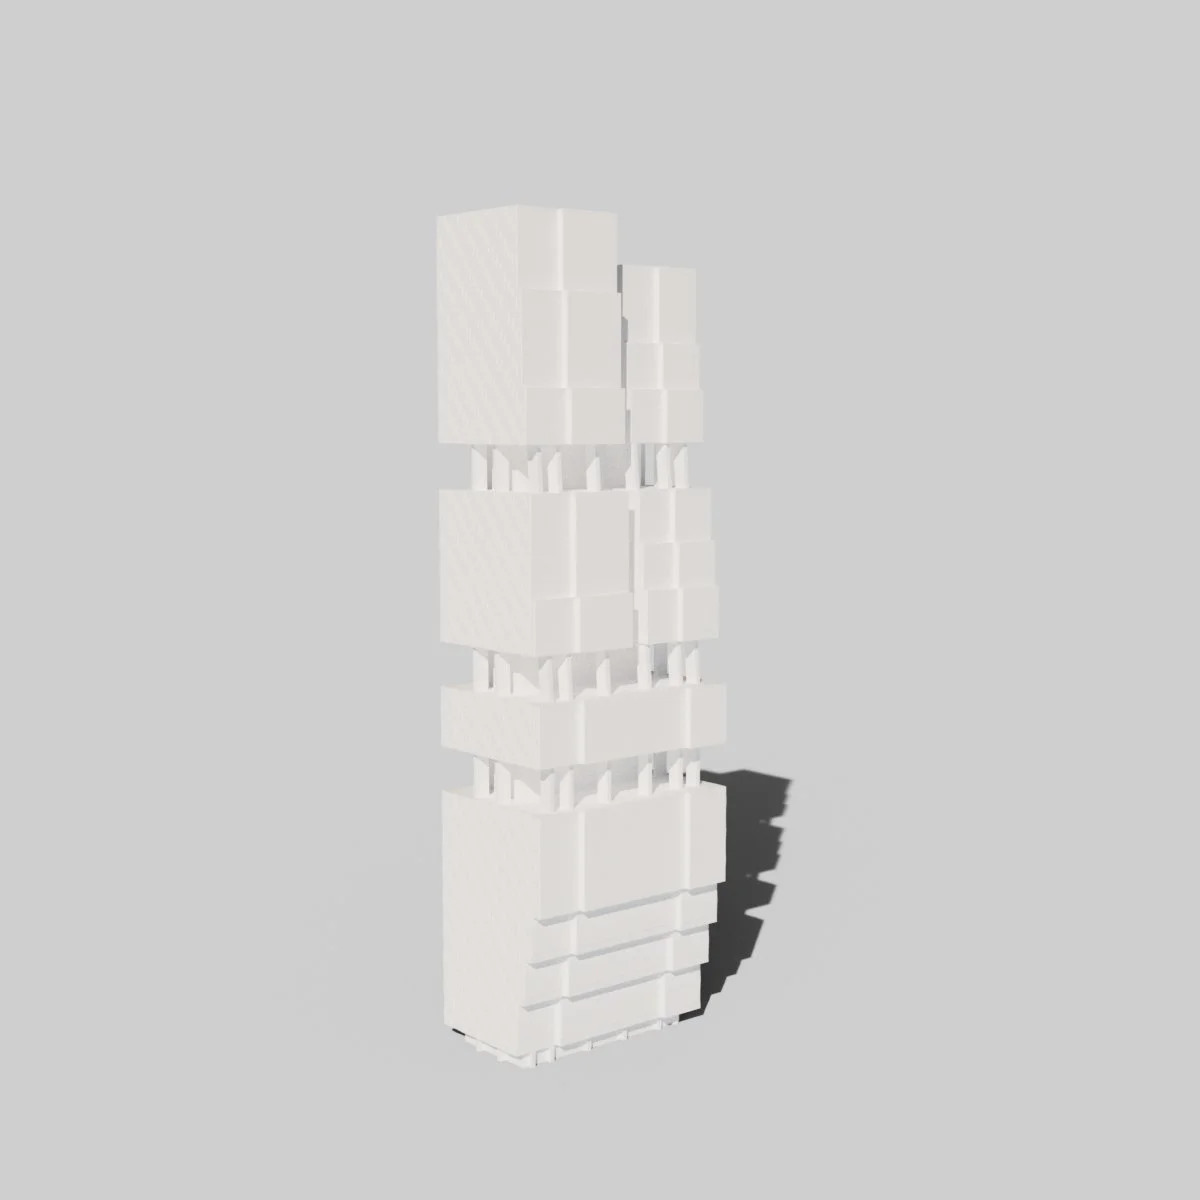
An example of later reduced complexity are the windows found on the newer buildings. On the South Tower model, each window consists of five models:
Glass Plate
Upper Frame Segment
Left Frame Segment
Right Frame Segment
Lower Frame Segment
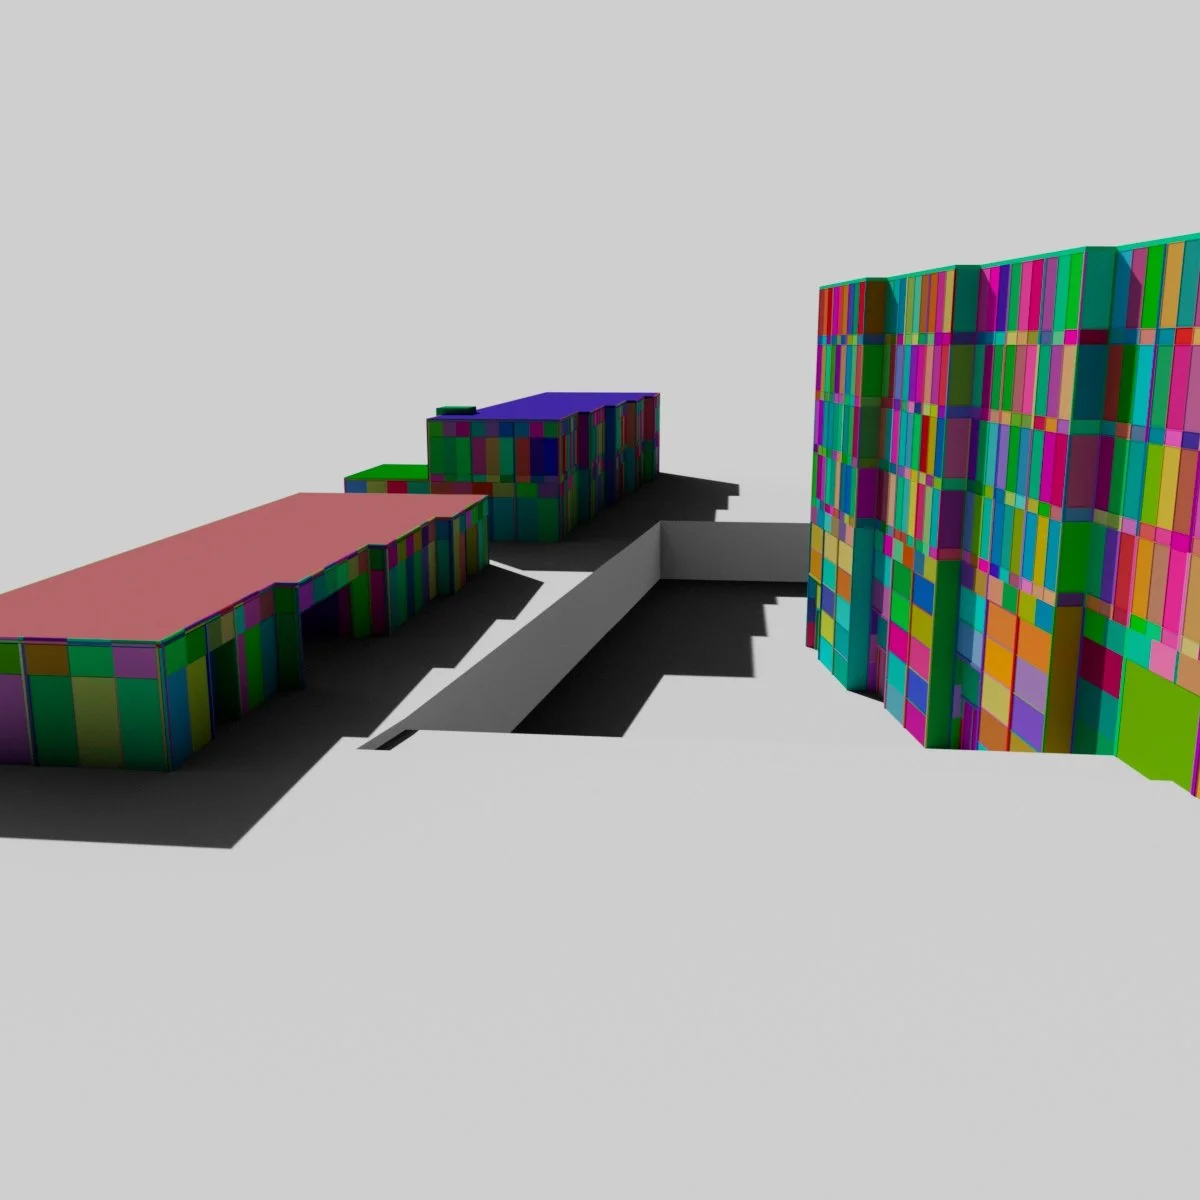
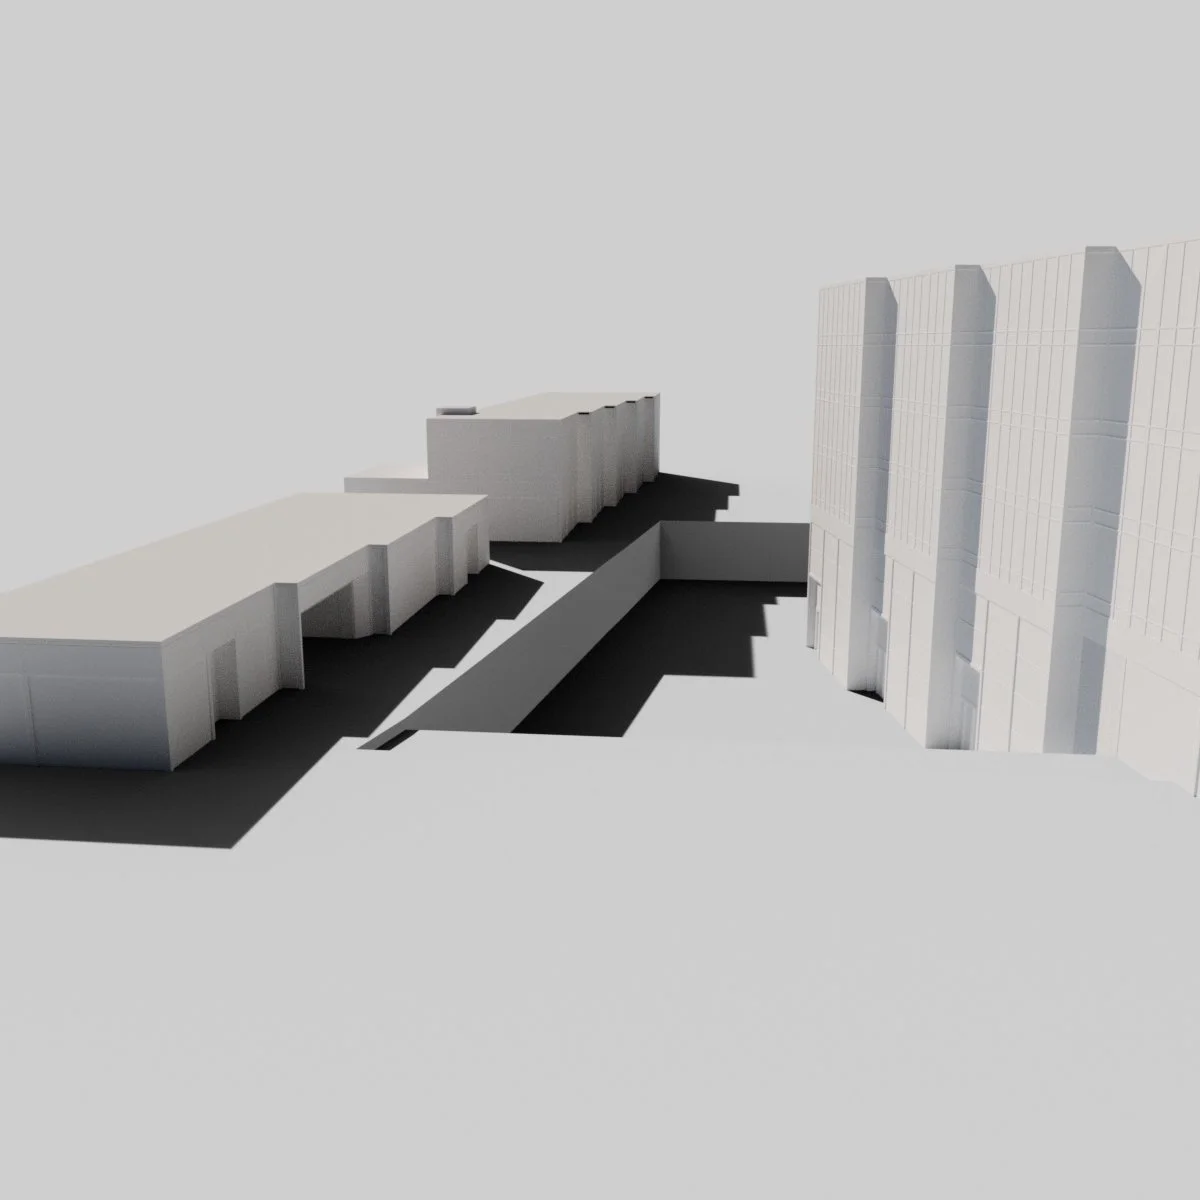
South Beach Avenue (Left) and West Tower (Right) Object ID Pass
Canopy
Unlike everything else across South Beach, the canopy which sits atop South Beach Avenue, and curls up to form the front facing facades of North and South Tower, as well as covering the roofs of East and West Tower, was done by hand.
The canopy consists of a series of curves and Bézier curves, where control points were adjusted manually to produce the seamless, flowing appearance. Standard curves are used for the standard canopy segments, with Bézier curves used for the segments which travel up the North and South Towers.
The original intention was for the canopy to more accurately reflect its real life counterpart by having some parts solid, some parts with the panels rotated, and some of the gaps where sunlight is allowed to stream through, uninterrupted. However, once the project became untextured, doing this would simply add visual clutter, because the textures would not be present to help break up the image.
The curves were turned into the beams and panels by using the Flow Mesh Maya feature, and customising the result. Flow Mesh features a preset which allows for rounded cuboids to be made, with the corners and sharpness customisable, as well as the amount of segments. All the parts use 200 segments, meaning that it is just as fluid on the larger, sweeping canopy parts as it is on the smaller ones.
Per part, only curve is needed. This is because the same curve can become multiple meshes. As such, one mesh is aligned along the left to the curve, and is tall, but short, the second is also aligned to the left, but is short and wide, and the third produces another tall, thin mesh, offset to the other side of the second mesh. The two tall, thin meshes produce the left and right rails which embrace the middle mesh, the panels.
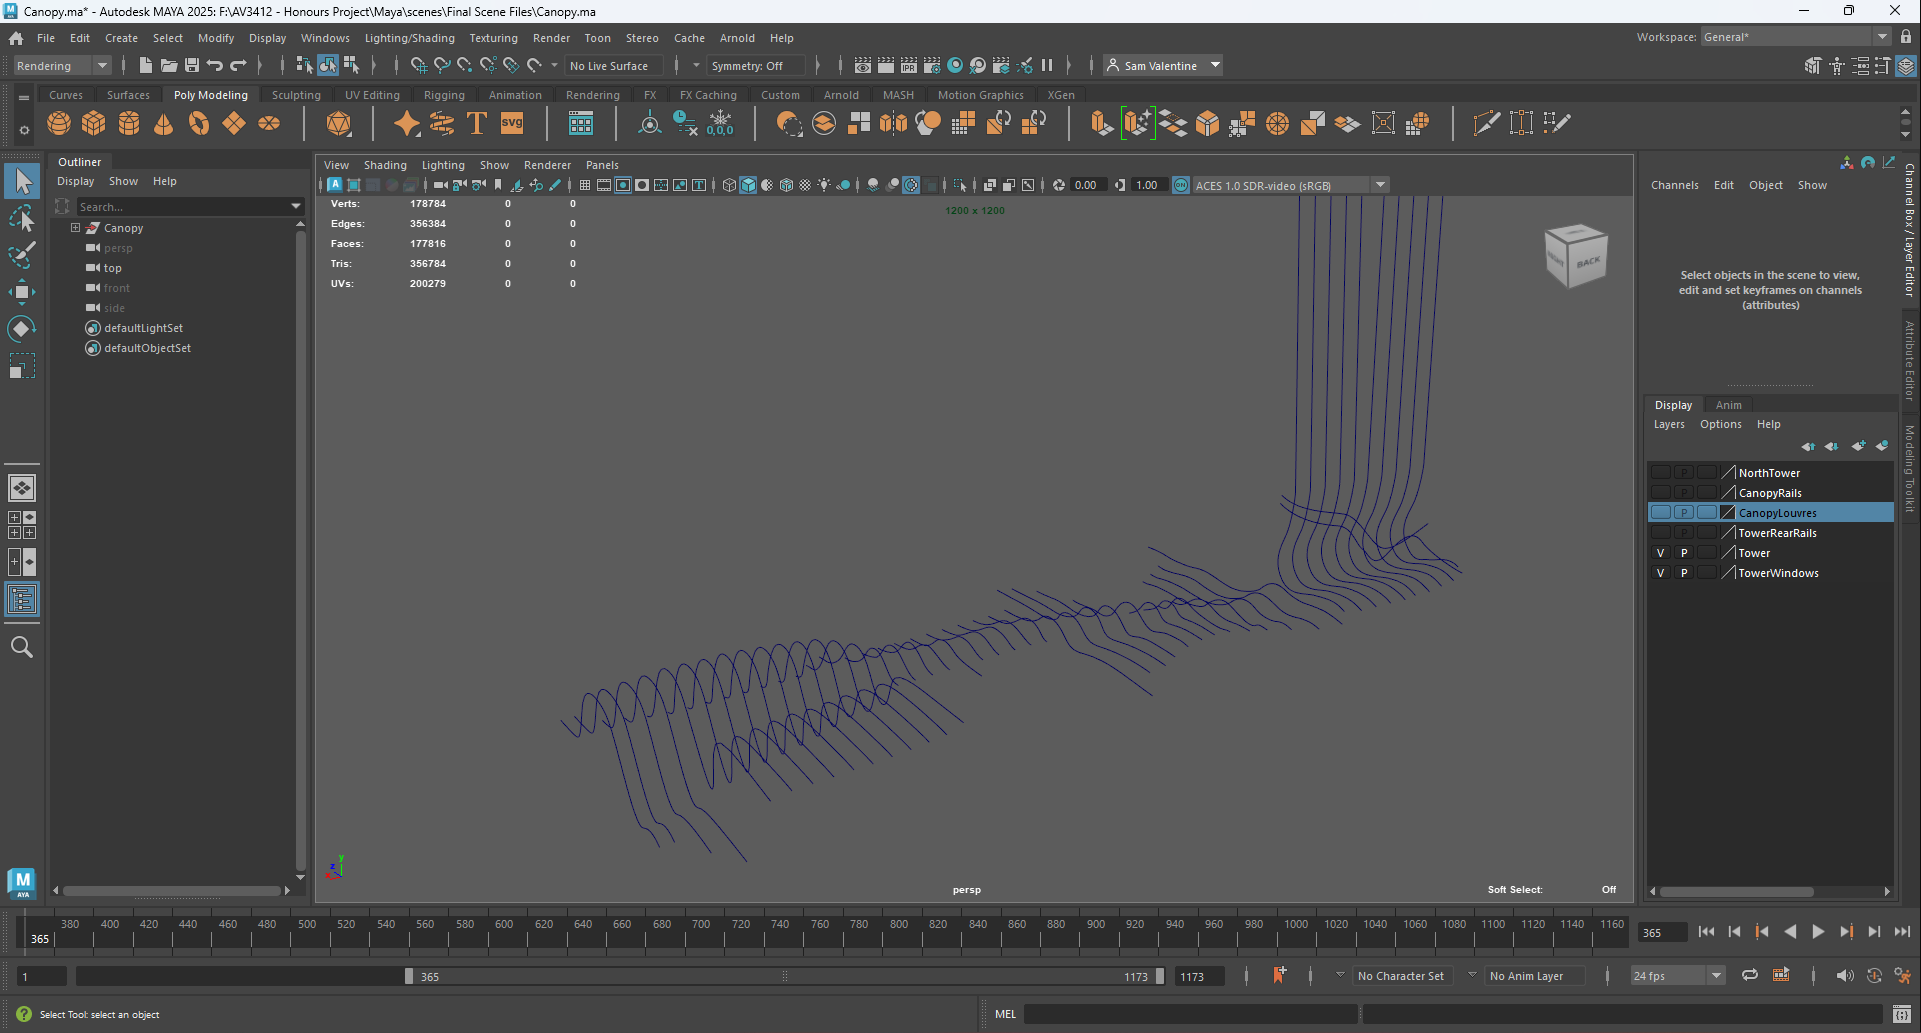
Canopy Maya Screenshot of the Canopy Curves
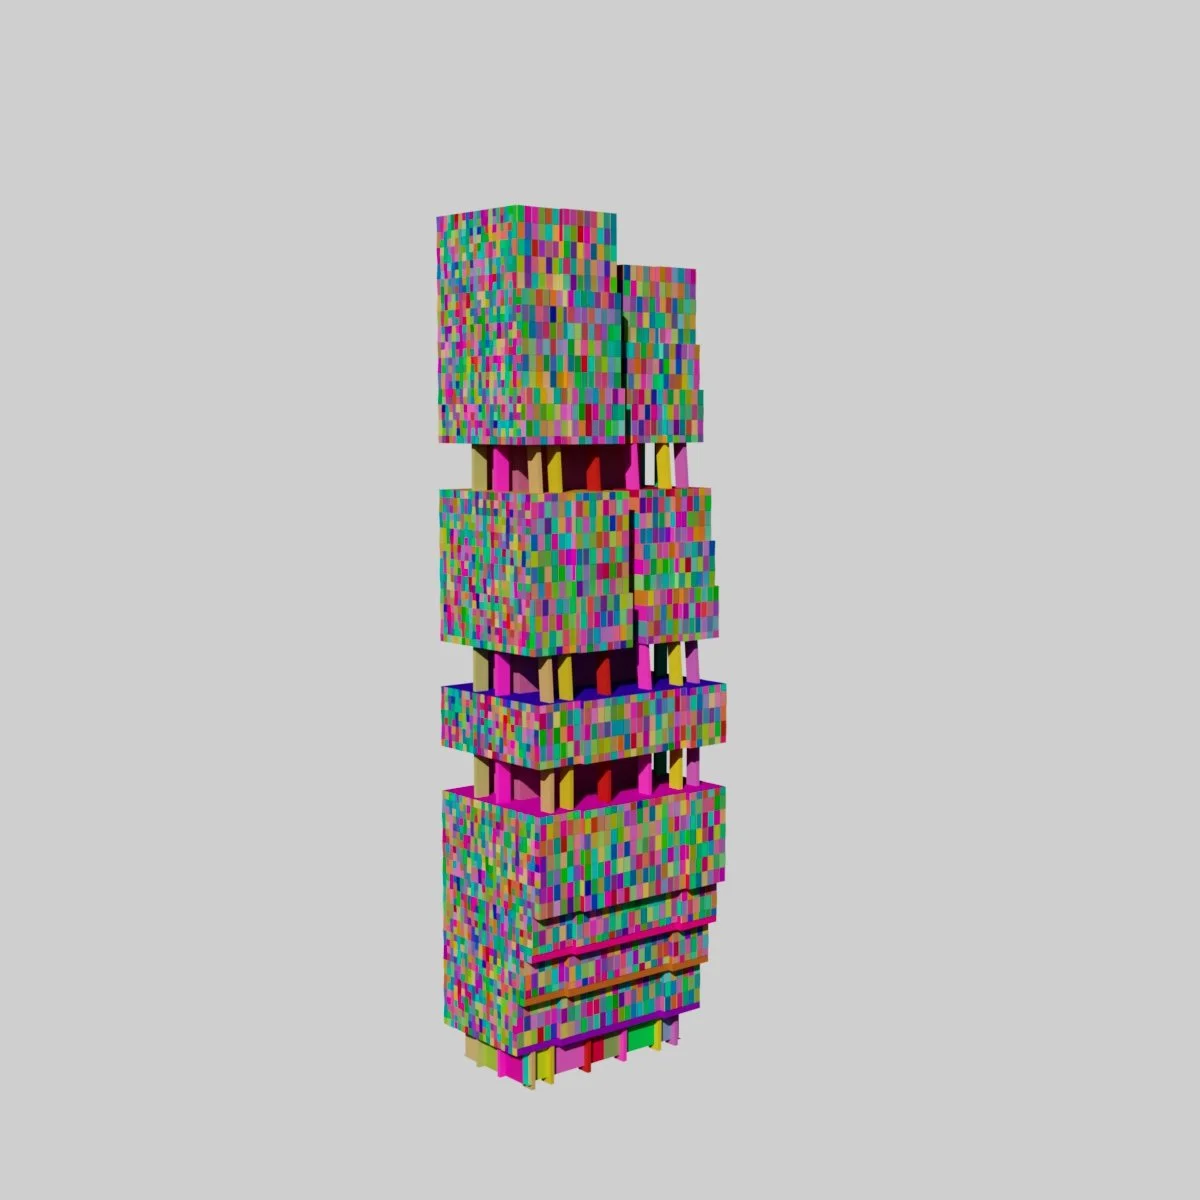
South Tower Object ID Pass
Meanwhile, the windows found at South Beach Avenue, whilst not identical, but based on the same concept, consist of only one model. This means that all buildings using the South Tower window design (North Tower, East Tower, South Tower, West Tower), five times the objects need to be loaded in than might seem necessary.
As the issue of file sizes and read times became more important, I began to retroactively fix some of the data hoarding issues in the scene files. For example, North and South Tower consist of an underlayer, which is cut with edge loops to identify where the windows should be placed. Every layer of windows had its own underlayer, so the poly count began to skyrocket. To fix this, I had to identify where the underlayer was exposed, and either cover it up or fill it in, and then I was able to delete the underlayer.
Emphasis on Detail
As you can see from the image above of the South Tower, hundreds of objects create a building model. The reason for this, and the reason why so many of the buildings have seemingly unnecessary details on them is because of the aforementioned issue of texturing. If I could not make the site look photorealistic via texturing, I would have to pour as much effort into capturing the small details, so that the amount of work would show itself off in the final renders and artefact.
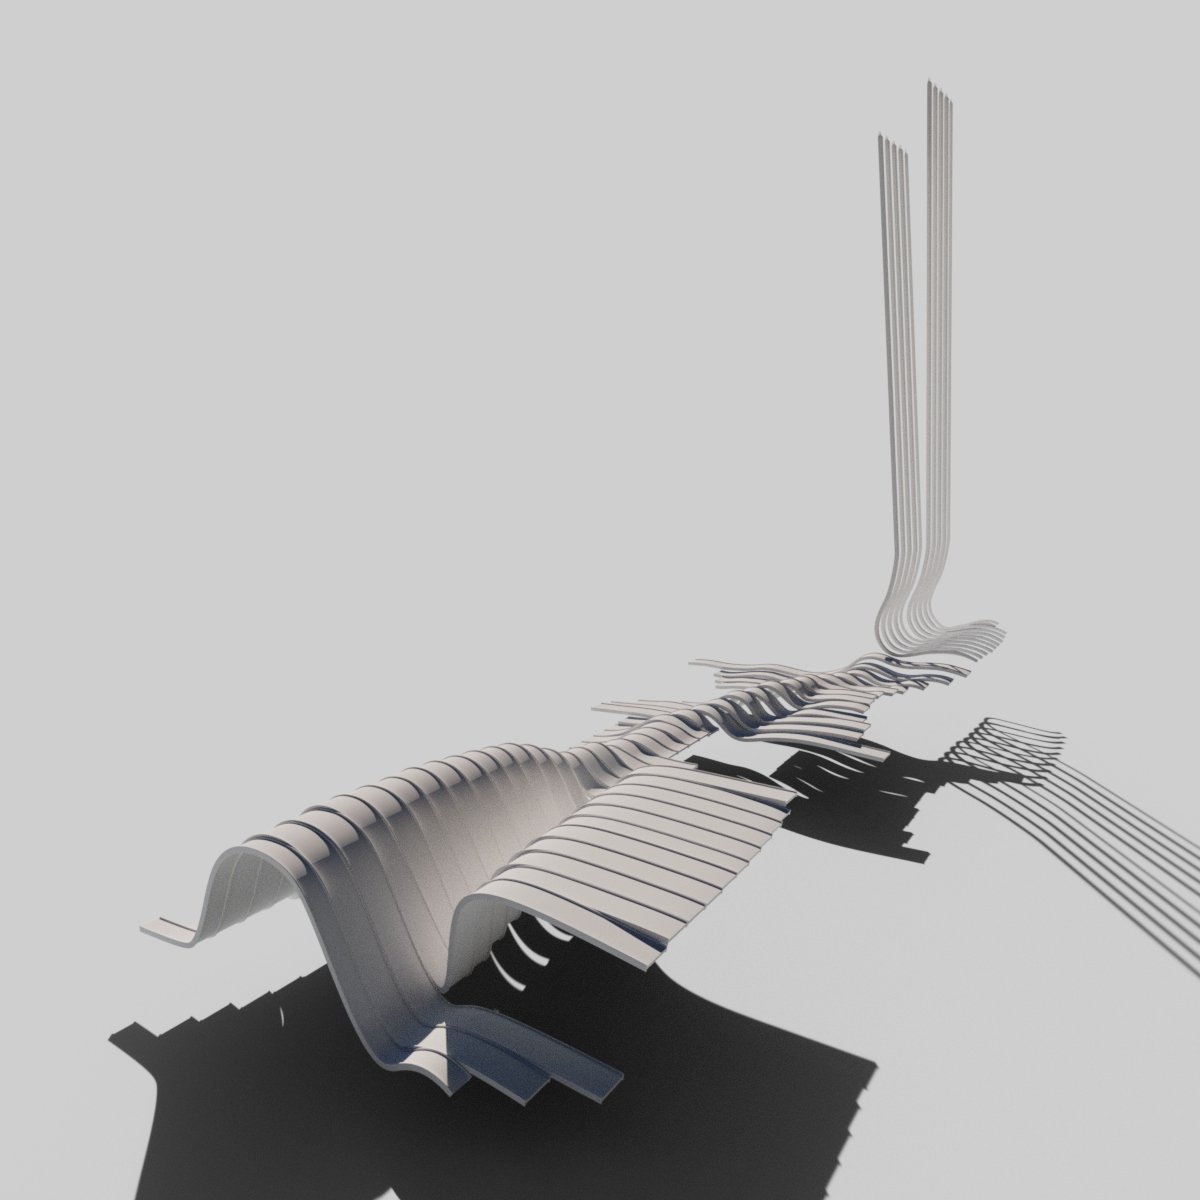
Canopy Render

Canopy Object ID Render
Assembly
All the buildings were produced in separate files, using the same reference guides, to ensure that they needed only to be imported into the final scene for assembly into the finished arrangement. This was also where some of the last adjustments had to happen.
The Grand Ballroom, for example, sits across two different levels of elevation. The first level of elevation, which the original building sits on, is at the same height as Block One, which is lower than the other buildings in the scene. Getting a guide for how low this had to be was easy, because now that I had produced South Beach Avenue, I could snap the elevated part of the Grand Ballroom to the same height as the ground plane for SBA, and therefore get the correct height for the lower parts.
Similarly, North Tower and East Tower sit slightly above this level, and South Tower has its base go to the basement floor of South Beach Avenue, with entry doors at the standard avenue height.
Cinematography
With everything modelled and laid out in the master scene, the next task was to plan out the shots and begin the process of rendering.
I specifically did not want to approach the camera angles and cinematography like i was doing a 3D model showcase, but as if I were there in real life, using an actual camera. As such, I watched a variety of architectural showcases on YouTube, including mansion and palace tours, to find out the popular angles and how the shots wove together.
I also wanted to make use of cinematic momentum. I.e. if a shot ends with the camera travelling quickly, the next shot should either retain this speed, or begin with this speed, but lose it throughout, leading to a slower subsequent shot.
The Edit
With everything rendered out, the final step was the edit.
The Method
I used DaVinci Resolve to assemble the final artefact, and set about using the shots I had to produce the best result I could achieve.
Part of this included reversing two of the shots, namely the boom shot, and the North Tower shot was slowed by 10%. These edits were mainly to keep time with the music.
The Music
For the music, I picked Astaire’s “Safe Place”.
I found the track as i sifted through countless ambient playlists. I knew i wanted the music to be somewhat serene, but also not something that would put someone to sleep. It needed to fit with the warm, natural, open feeling of South Beach, and Safe Place fit this critera perfectly.